Showing posts with label Liberty Society Bundle. Show all posts

Monday, 2 July 2018

Pretty Liberty Pincushion Tutorial - English Paper Pieced


July 1st marked the start of the 
'Liberty Scrap Challenge'
being hosted by Ava and Neve.


The idea of the challenge to to encourage you to use your scraps and share your makes using the #libertyscrapchallenge hashtag and just for playing along you go into the draw for some prizes from  Ava and Neve and fellow sponsors for the month of July.  Your makes don't have to be big and elaborate, but of course they can be if you wish. It is all about encouraging you to play and utilise all those pretty Liberty scraps. I am planning on a few smaller makes over the month.

My first make is this quick and simple EPP Liberty Pincushion.
I am sharing the tutorial with you today incase you too would like to make one, or two!

Please note that this tutorial does assume that you have basic EPP knowledge 
with regards to basing your shapes and sewing them together.


Requirements

Eight (8) 2" Squares of Paper*
Eight (8) 2.5" Squares of fabric 
Sewline Glue Pen / Refill
Thread - I have used Aurifils 80wt in a off-white.
Size 10/11 Milliners Needle
Your preferred Pincushion Stuffing
Button
Aurifil Floss 
(or a thick stronger thread for securing the button)


*I use a 120 - 180 GSM Paper


Glue baste (or thread baste if that is you preferred method) your eight squares
and then lay them out in a pleasing manner in two groups of four as pictured.


Using a whip stitch, English paper piece the two groups of four together.

Align them as pictured below and whip stitch the 'pink floral' and 'light purple floral' squares together.


Continue to sew the two four patches together working your way around. I worked anti-clockwise. 

Looking at the pictures below you can see that the 'orange floral' is sewn to the 'pink floral'. 
At this point your pink floral will have a square sewn to all sides and its paper can be removed.

The 'orange floral' is now sewn to the floral print with the purple flower.
The 'orange floral' is now surrounded on all sides and can have its paper removed.

Keep following the squares around and remove the papers as you go.
Do not be scared to fold any papers to allow you to align points as you sew.


Leave the last seam OPEN. 
Remove any remaining papers and turn your pincushion right sides out.
Stuff firmly with your preferred filling. I have use a fibre fill (toy stuffing).
Sew the last seam closed. I like to use a pin to hold the seam closed as I stitch.


Pick the perfect button, I have used a pretty sparkly crystal button. 

Using a strong thread (I used 4 strands of Aurifil Floss) and a long needle secure the button to the centre of the pincushion forming an indent.  To do this, decide what will be the top and bottom of your pincushion. Thread your needle up from the centre back of the pincushion through to the centre front of your pincushion, holding a tail of thread to the back (you will need this to knot later), thread on your button and take your needle and thread back through to the back of the pincushion. Squeeze the pincushion firmly in the middle as you tie the thread at the back of the pincushion forming the indent. You might find this easier with an extra pair of hands.  Knot your thread a few times, trim away the excess thread and you have your finished pincushion.


Enjoy and don't forget to share with the #libertyscrapchallenge hashtag on Instagram 
for the month of July to be in the running for some prizes.  

If you don't have any Liberty scraps Avan and Neve have some bundles HERE and of course you can always start building a little Liberty Stash by signing up to their Monthly Subscription (details can be found HERE). I have to admit, knowing a gorgeous bundle of Liberty will be landing in my letterbox each month certainly makes it easy to cut into my Liberty on hand.

Happy Stitching,

Sharon x


Monday, 2 October 2017

Tulips, a finished quilt and a Kokedama or two!

Each month I receive the "Liberty Society bundle" from Ava and Neve and I was determined that I was going to use the gorgeous Liberty Fabrics and not just stash them. So once I saw the gorgeous

"Diamonds and Squares Quilt" 

by Emma Jean Jansen from her book, By the Bundle I just knew that this was a project that I could slowly add to each month when my bundle of Liberty fabrics arrived, knowing that I wold have a beautiful quilt when it was finished.


It is my favourite time of year in my home town of Bendigo, the Tulips are flowering so it was the perfect time to take my new quilt out for some photos and yes, weird looks from the tourists!


The Tulips are just stunning and if you happen to be in the Bendigo area for the last week of the school holidays I strongly recommend that you stop by the Tulips. You can't miss them, they are on the main road that goes right through town.


I also discovered a new to me shop.
"Living Gifts Bendigo"


If you are visiting the Tulips, look across the road and locate 'Grilled'.
You will find this little gem just a couple of shops down from Grilled.

I have started to add some indoor plants to our home over the last few months so I was super excited to find this store. These two Kokedama's came home with me  and I will be visiting again for a few more plants.


"Dare to stand out"


"Quilt Stats"

Pattern - 
Diamonds and Squares by Emma Jean Jansen 
from her book 'By the Bundle'.
Block size - 8'
Finished Size of my version - 56" Square
Fabric - Various Liberty Prints
Fabric sourced from Ava and Neve


Now to find a new pattern that I can continue to use my Monthly Liberty Bundle for.

Any suggestions?

Until next time, happy stitching,
Sharon x


Tuesday, 12 September 2017

Bjorn Bears - A new Quilt for Lily is in the making. {Giveaway Winner Announced}

My little girl, Lily, absolutely LOVES hand made.
She always wants the newest quilt in the house on her bed and that is usually where they end up.
I have done some research into the archives and the last new quilt that Lily had made for her was Lollies, pictured here.


And as a total coincidence, this finish was blogged two years ago TODAY!


Lily has been patiently waiting for my Tenderness quilt to go on her bed but with it off on another little holiday, this time to New Zealand that is just not going to happen for a while yet.  


I had started to make her, her own version. She has picked all the fabrics for the flowers etc, I just don't have the time or speed at the moment to stitch it for her so we have started another quilt, machine pieced, just for her and her bed.

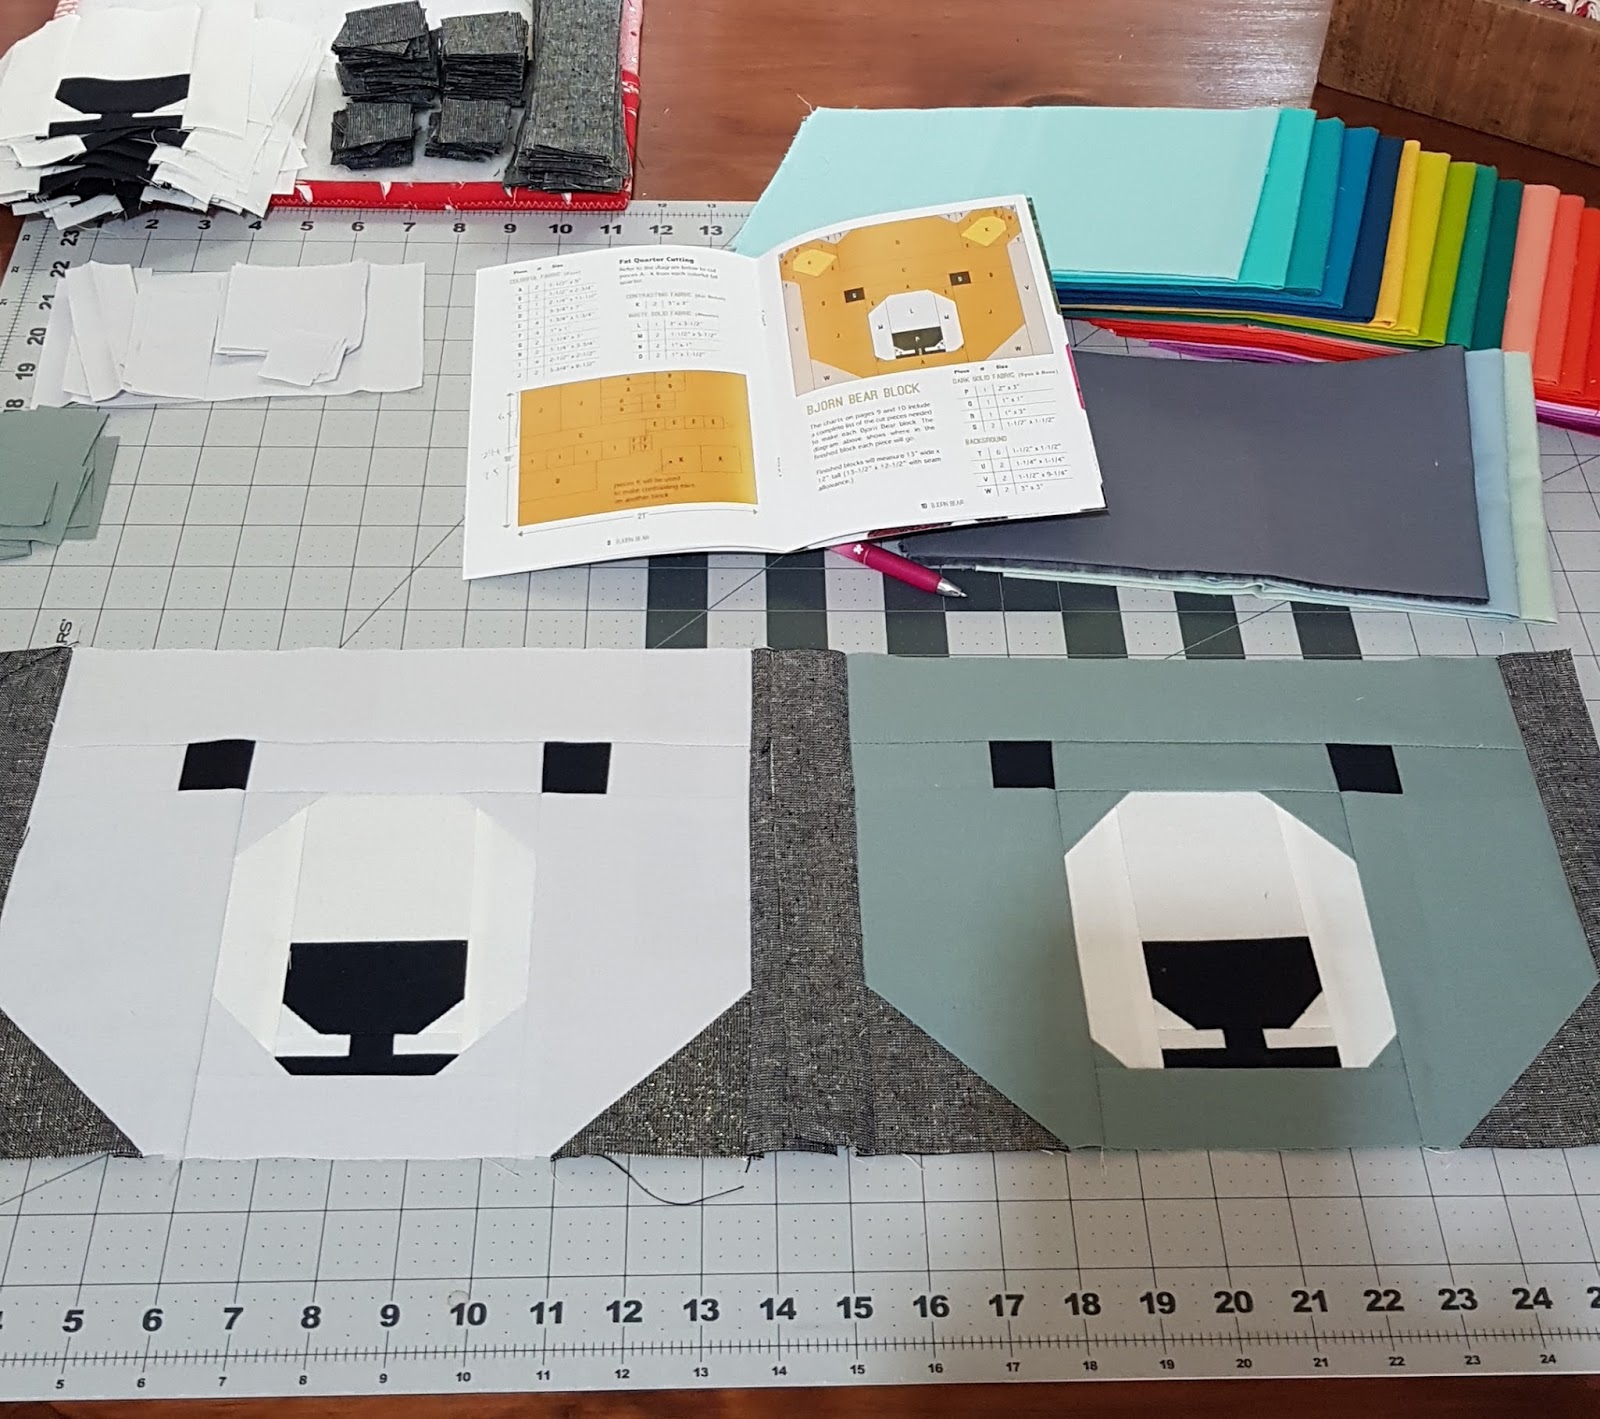
We are making "Bjorn Bears" by Elizabeth Hartman.
A fun quilt made with rainbow solids. I had purchased this one as a kit but swapped out the background fabric for a Sparkle Essex Linen.


I started by chain piecing all the the muzzles and truth be known, I had made the weeks ago but they became lost, or just covered in other projects on my cutting table but we are back at it now. 


Then when it came to piecing the faces I made a "Design Error". Well that is what I am calling it.
The 'happy' bear on the left is my version and the one on the right is how the pattern is written.
I wasn't too sure if my OCD could handle have my version in the quilt so I pondered a remake.
When posting my 'whoops' to Instagram many said that they liked my 'happy' version and as it happens so does Lily. She actually prefers the 'happy' version and has asked for more of those to be in her quilt. So we are going to have a mix.


I love it when a quilt takes you on its own little journey.
I am also changing out the solids on the ears for Liberty fabrics to soften the quilt and to give it a little more of girly feel. You can also see the Sparkle Essex Linen here. It has a gold fleck through it.


It turns out that photographing 5 Bjorn Bears once pinned to my design wall is a little hard but here they are.


And No. 6, another 'happy' bear was made this afternoon.


I am hoping that I can do a couple a day until all 25 Bjorn Bears are made.
I will pop back and share my progress next week.

Before I go, one last thing. 
The Giveaway Winner of a copy of my new pattern "Gone Crazy" and the bundle of Kona Solids was Susan T.
Susan has been contacted by email and her prize is being posted to her this week.
Congratulations Susan.

Happy Stitching,
Sharon x

Thursday, 31 August 2017

Liberty Washi Tape {TUTORIAL}


I always find it hard to throw out scraps. There must be a million ways to use them up but sometimes time is limited. With the constant flow of Birthdays and with Christmas fast approaching I have turned my attention to ways of better 'styling' my gift wrapping and what better way, than with fabric scraps.


After a quick visit to Bunnings and a little help from a staff member I eventually found some double sided tape. They had a few different widths available, this time I decided on the 36mm.


To make your own Washi Tape is super easy once you have the double sided tape.

1.     Simply cut your scraps to the same width as your tape.

2.     As you unwind the tape one side is sticky so carefully lay your fabric on the tape (sticky side), right side facing up.  Continue to lay all you scraps end to end along the tape.

3.   When you reached the end of the roll, or when you run out of fabric,  go back and trim between the start and end of the fabrics as they change.

4.     Then carefully, withy rotary cutter and ruler, cut down the middle of the tape making two long lengths. Omit this step if you are using a thin tape or want a thicker Washi tape. 
 Effectively my 4.5 meter roll of tape was now 9 meters.

5.     Trim your lengths to your desired length. I chose to go approximately 3" 

6.     (Optional) With your scissors, trim each end of your Washi Tape on an angle.

Peel the back off your new "Washi Tape" and you are ready to go!


I couldn't help myself, I also dived into my pretty pink Liberty scraps and made some more with a second roll of tape.


I now have approximately 18 meters of pretty Liberty wash Tape.


You may also recognise my first lot of Washi Tape. 
I made if from the offcuts of a project that I get to share with you next week and that project has been made with this months Liberty Society Bundle from Ava and Neve.


Next visit to Bunnings I might grab a roll of thinner tape for the smaller scraps :)


Time to go and "Washi" everything!

Happy Stitching,

Sharon x

Tuesday, 22 August 2017

Navy, Mustard, Grey and a touch of Teal ....... Oh My Liberty!


Every month the 
Liberty Society Bundle from Ava and Neve 
arrives in my mailbox.


Each and every month the new bundle becomes my new favourite and this months, again, is no exception.

Mustard, Navy, Grey and a touch of Teal.

This months bundle is truly a stand out in my eyes.


Those who follow me on Instagram will know that I sew a LOT with Liberty Fabrics.
The cover quilt for my new book is sewn with Liberty Fabrics and I am also slowing (emphasis on the slowly as I am only on my 3rd row!) making a new version of my Stargazer Quilt using Liberty Fabrics.


 I used to have a difficult time cutting into my Liberty Stash. It's just feels so indulgent and a little precious to use but believe me when I say, it is even more precious when it is sewn into something you love. I absolutely love English Paper Piecing with Liberty fabrics and I love to mix in some Chambray and Linens. They all work so well together. 


This bundle below was from a previous month.


When it comes to cutting into my Liberty, it also helps knowing that a new monthly bundle is only ever a few weeks away so there will always be new Liberty prints to play with.


The name of the fabrics are listed here from top to bottom:-

Summer Blooms
Hedgerow
Fancy Free
ED
Wiltshire
Glenjade
Yoshie
Capel
Mythical Forest
Wild Cats


My hardest decision today is 'what will these become?'
They are such a perfect combination that I feel they need to be a project of their own.

If you would like more details on this monthly subscription
visit Ava and Neve HERE.  

I am off to pat my new fabrics for a little longer and plot a plan.

Happy Stitching,

Sharon